Our group project was to create various objects using Blender to incorporate into the VR room that is Aech’s Basement from Ernest Cline’s novel, Ready Player One. Each group member brought their complementary individuality which added unique insight, helpful suggestions, and overall, great team camaraderie.
Below, each member of the group highlights their creation process and touches on how important intermediary group projects are to boosting confidence, gaining experience, and pushing academic boundaries.
But first, please enjoy this Game Trailer created by the invaluable, Vincent H.:
https://youtu.be/StVIVT0FUZM
Cheers!
ENGL 3726-01 Final Group Project
Janelle O.
The Stages of Using Blender as a Tech Novice
Stage 1: Fear

I’ll admit, I let my insecurities get the best of me.
Make a virtual reality object? Me? Someone who’s never worked on anything STEM related before? In a software that has millions of buttons to press and things to mess up?

I watched countless YouTube tutorials and felt like the hosts were speaking in a foreign language. It was so difficult for me to believe that I could comprehend, and eventually implement, what they were telling me. The self-inflicted intimidation inevitably led to…
Stage 2: Frustration


No commentary necessary.
But, if you were wondering how many times someone can restart a project on Blender and come thiiiiiiiiiiis close to throwing a computer across a room…

On the brink of a complete meltdown, I took a step back and realized that I may have been giving Blender too much power. Were the tutorial gurus really speaking in a different language? Was is truly as difficult as I believed it to be? Absolutely not…and once I accepted that, it was smooth sailing toward…
Stage 3: Success

Ultimately, completing my object brought me relief; relief that I would never have to use Blender again! Kidding…kinda.
I felt a wave of satisfaction and pride knowing that I proved myself wrong. I was able to use software I had never used before to make an object in a world I had never visited prior to this semester. This project allowed me to fine tune a skill I didn’t know I possessed in a field that intimidated me beyond belief.
Am I switching my major to Computer Science? Absolutely not.
Did I gain experience and insight in an important field? Yes.
Most importantly, did I learn and grow in ways I never could have imagined? Yes.

Vincent H.
Skee-Ball Machine and Game Trailer
With limited experience with MATLAB and none in computer graphics, I cautiously approached this project that proved to be an interesting venture into the world of 3D modeling.
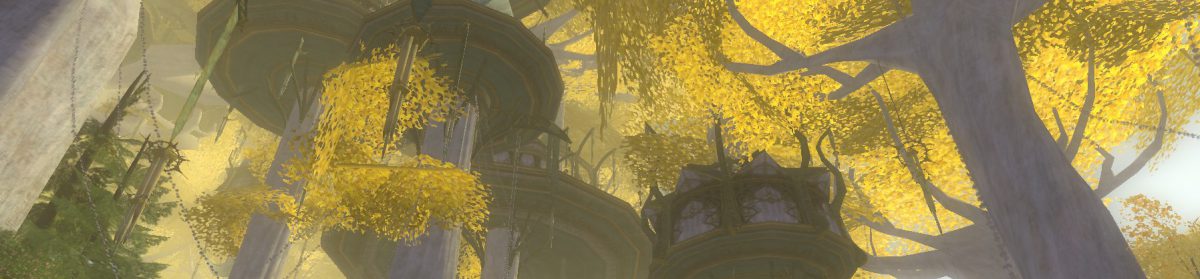
Our task: supplement an existing virtual reality model of Aech’s basement based on Ernest Cline’s Ready Player One.
Since many of the objects explicitly named in the book had already been created, I needed to immerse myself into Cline’s world and extrapolate other plausible objects. I was inspired by his line: “Most of them were gathered around the row of old arcade games against the wall.” Though not quite old enough to be an 80’s kid, waves of nostalgia still swept over me as I recalled running through a labyrinth of arcade games in Chuck E. Cheese’s as a child. Each corner was filled with vibrant lights that tempted me with the opportunity to win tickets. Stopping in front of a Skee-Ball machine, the objective seemed simple. Whichever prize I earned would be a manifestation of my skill and not chance.
This childhood memory compelled me to create a Skee-Ball machine, and so I did.
 Perspective view of Skee-Ball machine in Blender
I started by searching for various makes and models of Skee-Ball machines to provide a historically accurate model; in doing so, I also learned more about the rich history of the game. Skee-Ball was invented in 1908. Aggressive marketing campaigns created an exciting buzz around the game, eventually being featured in various media outlets, with one of those being a game called Superball on The Price is Right.
After finding the ideal model to recreate, I began in Blender by creating a scaffold of rectangular blocks to create a vague table-like structure. Blender has a variety of tools for detail work, so after creating the basic shape, I began adjusting the edges, gradually working towards the sleek and tapered model. After using bevel to create curved surfaces, knife to stencil point values on the backboard, and subdivide to generate the metal mesh, my Skee-Ball machine came to fruition and fits well in the room.
 Clockwise from top left: (1) Model of vintage 1980s Skee-Ball machine for design accuracy, (2) Wireframe view of final object created in Blender, (3) Rendered view of Skee-Ball machine and ball in Blender, (4) Rendered view of Skee-Ball machine and ball in room environment created with Unity
The object at the end of this meticulous process was similar to the wireframe structure shown above, except for one important feature: it was colorless. I spent the next few days experimenting with different shaders in Blender to generate the matte texture and metallic luster of the machine’s frame. Upon completion of the frame, I was stumped by the deceptively intricate and random texture of the felt for the machine’s surface. Luckily, a trove of insightful guidance and templates were available on the internet, so I found a relevant node map and adapted it for my use.
 Node map of blending shaders to create colors and textures
After a few finishing touches, I exported the object and passed it to Vivian for the final step: uploading to Unity. This project gave me a profound appreciation for the computer graphics all around us, increasingly seen in movies. Although the true experts with years of experience are capable of creating models nigh indistinguishable from real-life objects, anyone with the dedication to learn can become proficient within a month. As a STEM major, I truly valued this rare opportunity to exhibit artistic creativity and learn cross-disciplinary skills in an epic quest to remediate Ready Player One.
Robert W.
The Music
My responsibilities differed a little from the other group members. My time was pretty evenly split between the softwares Blender, Finale, and Cubase. I wanted to add a little aural spice to the otherwise silent basement. Since a large portion of Aech’s and Parzival’s time is spent playing video games, I thought video game music would make the most sense as an incidental soundtrack. One of the only games the author mentions explicitly as a favorite of Aech and Parzival (which also has a decent soundtrack) is Golden Axe.
 My 3D model of the Golden Axe Genesis cartridge
I turned to that soundtrack as a source material for my synth work. I arranged a piece of music from the game, which took several hours of transcription and input in the notation software Finale (the only piece of software I was already familiar with).
 The Finale file of my arrangement
From there, I exported the midi file into the digital audio workstation Cubase. Cubase is where I got to transform my generic midi file into a slightly more interesting electronic piece.
 Raw import of my Finale file in the Cubase DAW
I wanted my percussive sounds to emulate those of a sega genesis system, so I worked with the virtual instrument VOPM, a digital synth designed specifically to emulate a sega genesis sound chip. My work with this synth proved a unique challenge. You must describe a sound in your head in terms of attack time, attack delay, reverb, detune, modular shape, etc. in order to create the instrument sound you desire.
 VOPM interface
In order to add a unique, slightly more palatable character to my arrangement, I used some virtual instruments created in the Spector digital synth, which is a more modern and practical plugin than VOPM.
 Spector synth. Fun fact, the total cost of the software I used for this project exceeds $1000. Thankfully Blair owns all the software so I didn’t have to foot that bill
Even though music is the focus of my degree, my engagement with Cubase and electronic music in general has been limited. Nearly every step of this project (outside of arranging the original track) was a new and valuable experience for me.
Wooseong C.
Modeling and UV Mapping
I came into this project without even knowing what Blender was. When I opened the software for the first time, I was overwhelmed by the number of different tools and view modes the software offers. I mainly learned from Youtube videos that showed the step-by-step process for making a 3D object. During the process of learning to use this software, I learned two Blender fundamentals – modeling and UV mapping.
Modeling simply refers to crafting the shape of your object to match that of the real-world version. This often requires you to have a second window with a picture of the real world object you can refer to:
 Modeling an open magazine – I chose to create comic books to add to our VR version of Aech’s basement. I wanted to have a comic book that was open to add to the “realistic” aspect
Having a reference is really helpful, as it allows you to be more detailed and accurate. The process of making an open comic book entailed making a plane, extruding edges to make the folded part and curvature indicated by the red arrows (above), and adding the subdivision surface and solidify modifier:
Another blender skill I learned was UV mapping. This step allows the user to map an image acquired online onto his/her object. This allowed us to map images onto our posters and comic books:

For the Astrosmash cartridge, additional steps were needed during UV mapping. Because I needed to add different images to the different surfaces of the object, I had to incorporate the use of Photoshop. The steps entailed unwrapping the 3D object into a 2D map, exporting this UV map to Photoshop, adding the online pictures to the photoshop, and importing the new UV map back to Blender
Overall, learning to use Blender to add objects to our VR representation of Aech’s basement was a very valuable experience. Although the initial learning stage was difficult, I can now use Blender at the beginner level. I now appreciate the vast amount of options and tools that overwhelmed me in the beginning, because it reflects the infinite amount of possibilities one has to create characters and objects. I am very glad that I took this course during my last semester at Vanderbilt. This course was different from all the other courses I have taken, going beyond the traditional essays and lectures, ultimately creating a more hands on learning experience. This final project really gave me appreciation and the confidence to continue using programs like Blender and photoshop in the future.
Vivian L.
Uniting All Elements in Unity
My role in the Aech’s Basement project group was to take each of my other group members’ separate Blender 3D objects and any other creations they worked on and implement them into the Unity Scene, ensuring everything looked as it was intended and worked properly. Another portion of my job was to raise the almost non-existent level of interactivity in the room. Prior to this semester’s final project, the player was not allowed to move within the room at all, and there was no way to touch or pick up objects, and I desperately wanted to change this.
At the beginning of this project, while all of my other group members worked on creating their assets, I researched and tested different ways to allow camera and body movement in VR. I looked into Unity Oculus Rift support pages, watched many Youtube video explanations on how to track the headset, and what the sensor controllers were called when used in the Scene. My initial thought process was to create a system in which there was a camera affixed to a Capsule 3D object that represented the player. The capsule would then rotate and translate itself according to the detected player headset movements and the Oculus Rift controller joystick input. To create the hands, I wanted to move two Sphere Colliders anywhere that the touch controllers were sensed. Lastly, to simulate the ability of picking up objects, when the player moved their hand Sphere Colliders to hit any other object that was meant to be moved, had a collider on it, and the grip trigger on that hand was being held down, the object would follow the Sphere Collider’s movement.

Sounds fairly simple, right? I had initially thought so too.
However, I soon realized that although I had the thought process down, I had no idea how to physically code them into the room. I had scarcely any experience with writing C# code, which is the primary language in Unity, as well as using any of their numerous class libraries. I was also still piecing together how the controller input was read in Unity, and was largely unsure of how to read physical headset location. Another difficulty was the inability to test my code outside of the VR space in the Wond’ry.

After another week or so struggling to write my own interactive player in VR, I decided to ask for Dr. Molvig’s help on the issue, since he was my professor last semester in the class Virtual Reality for Interdisciplinary Applications. He showed me many helpful websites and more videos on VR player bodies, especially Unity’s own player model. Following tutorials, I was able to put the model into the scene, but it didn’t quite work as expected.
#1 tip for all things Comp Sci: It never works like you expected
In fact, it crashed the game many times, and even when I got the Scene to play, my attempts in creating the hands painstakingly exact to a video I was recommended were ruined by the fact that it seemed as if the controllers were not being tracked in the scene at all! I believed that it was partially due to last semester’s attempts to create a teleportation system that was quite ineffective, and the tampering of the Scene files.

This led to another large difficulty in my project. Since Unity does not allow the copying of Scene objects with their existing properties into another separate project, I would have to choose between spending more time trying to fix the existing scene, or create an entirely new Scene and copy all of the objects into it by hand. Given all of the time already spent trying to bugfix whatever was going on in the original scene, I decided that starting over may be my only choice if I wanted the movement and object interactivity to be a part of the room. I spent many days re-importing and organizing every detail of the room, testing it along the way to make sure that body and hand movement still worked.
Once I had finally recreated the original room, I held my breath when hitting the “Play” button one more time. It worked! The camera moved, my hands moved, and my body moved! I was filled with relief, but this was only the first step.
It was time to put the efforts of my teammates into the Scene. Altogether, we had quite a few assets created to put into the room; comic books, a skeeball machine, posters, a VCR player, game cartridges, and more. (I’m sure my teammates could tell you a lot more than I can about the specifics of their objects!) I also added a few Coke cans, mainly for hand and object collision testing.
A few things happened when I trying moving the objects into the Scene.

- Objects were completely devoid of color.
- They were ginormous.
I knew I had to fix the color issue, but the size was not a problem. I could scale it to my will, but adding the correct materials was a separate hurdle. I researched what each of the little options on the objects did, and realized that clicking a button labelled “Lightmap Static” allowed many options, one of which was to assign materials to certain surfaces of the object. This meant that I would first need a material to assign, though. My teammates largely used pictures online to properly wrap around their objects, so I looked up how to create Unity materials from images. Once I figured out how to do that, I realized that objects that were supposed to have separated images on each face, like the Betamax VCR player, had only one surface on which to put the material. Without a proper UV map, I went around this issue by creating the object out of 6 quads, each representing a side. Then, I assigned a separate material for each of them. This worked nicely for neat geometrical objects, but I worried what would happen with more complex ones.
 Thankfully, my teammates supplied me with UV maps that worked like magic for some of the other objects. For others, I simply looked up images online and utilized those. Sizing was done as realistically as possible
Eventually, every asset created was put into the Scene with the correct coloring and sizing. I was very happy with the results and seeing everyone’s work in the space, in VR, amazed me. Lastly, I was to put Robert’s Golden Axe music into the scene. I decided to create a Audio Source centered at the TV. I attached the Golden Axe audio clip to it, and changed the radii to reflect the distance at which the volume plays normally, and the distance at which it completely fades out.

This marked the end of incorporating each team member’s object (and music) into the final room. Aech’s Basement is far from complete, but progress is progress, and each team member had our own learning experiences completing their parts.


You must be logged in to post a comment.